Quick start: simulated devices
Cloud Pile Connect lets you create virtual chargers on the IoT platform and debug against your backend without real hardware or load. Supports YKC 1.6 and OCPP 1.6-J single-device debugging. For large-scale load testing, see Load testing.
Why simulate chargers?
Relying on physical piles and real energy consumption for every test slows down charging-stack development. Cloud Pile Connect provides protocol-level simulation for connection, charging flows, and message-level troubleshooting in the console.
Supported protocols
| Protocol | Simulated debugging | Simulated load test |
|---|---|---|
| YKC 1.6 | Yes | Yes |
| OCPP 1.6-J | Yes | Yes |
For YKC frame details, see YKC protocol reference.
Quick start (5 steps)

Step 1: Create a virtual device profile
In the console: Virtual device → Virtual device config → Add. Choose YKC1.6 or OCPP1.6-J and set connector count, electrical params, etc.
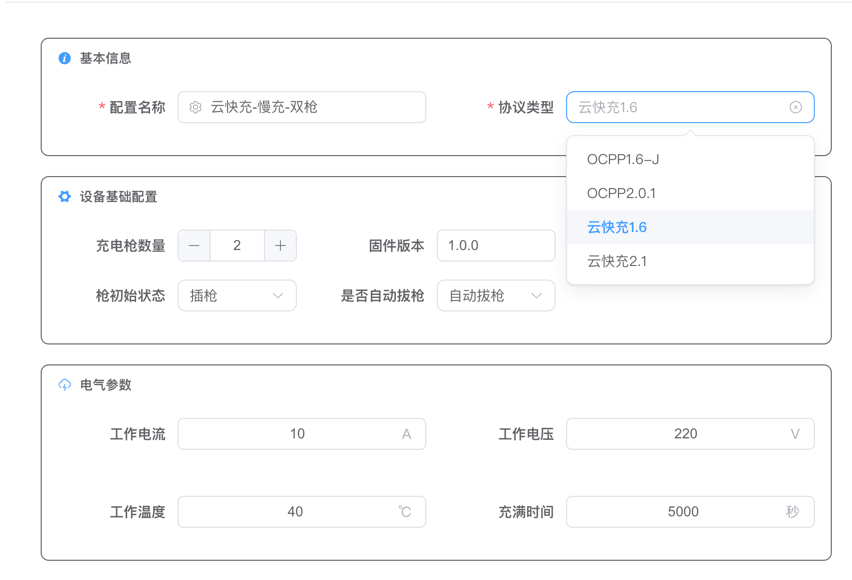
Main profile fields
| Field | Description |
|---|---|
| Protocol | YKC1.6 or OCPP1.6-J (JSON over WebSocket) |
| Connector count | Number of simulated guns |
| Firmware version | YKC program version / OCPP BootNotification field |
| Pile type | Fast vs slow (fast includes SoC and BMS-related reporting) |
| Working current / voltage / temperature | Electrical values while charging |
| Full charge time | Auto-stop delay for remotely started sessions |
| Heartbeat / status interval | OCPP heartbeat and StatusNotification periods |
| Plug and charge | OCPP plug-and-charge behaviour |
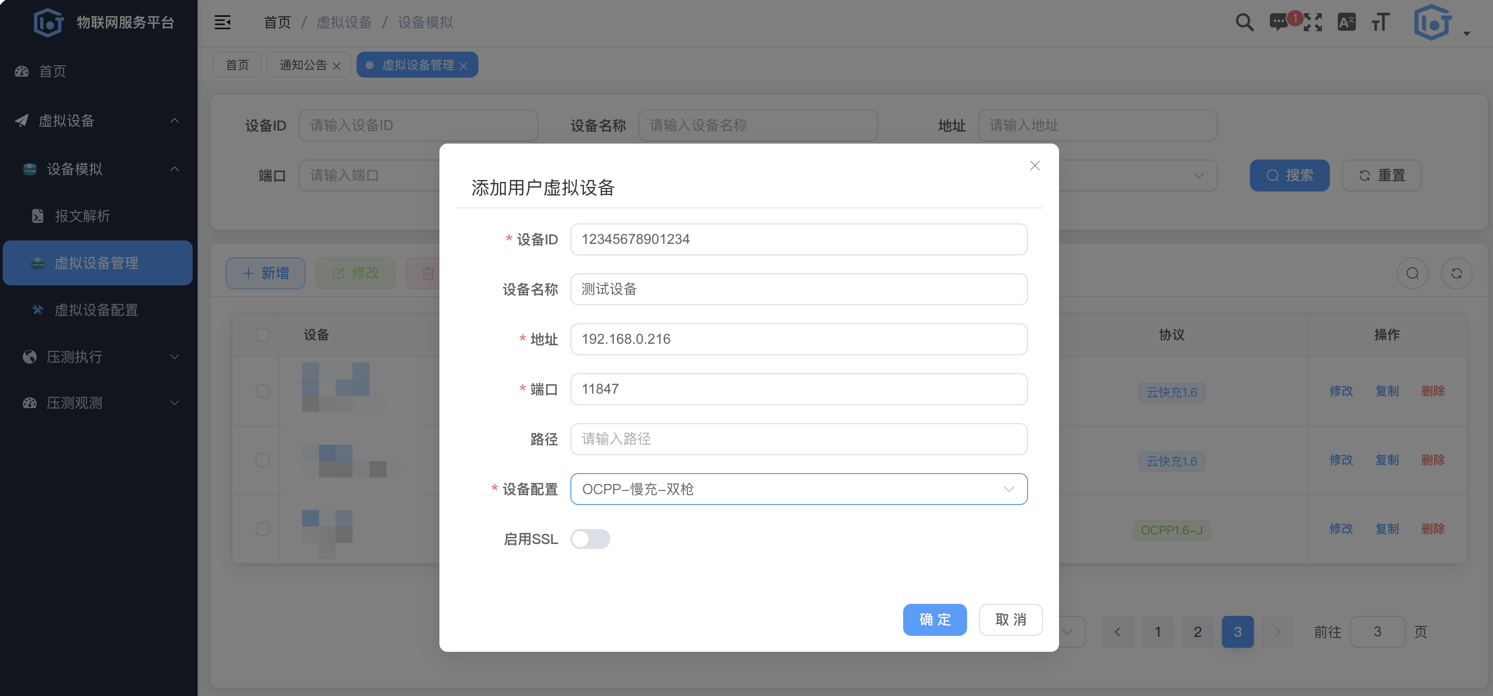
Step 2: Create a virtual device
Virtual device → Virtual device management → Add:
| Field | Description |
|---|---|
| Device ID | Unique pile identifier on your platform |
| Server IP / port | Target protocol server |
| Protocol | Must match the profile |
| Device profile | Profile from Step 1 |
| Path | Required for OCPP — WebSocket path |
| Enable SSL | Optional; one-way TLS or mTLS |
Step 3: Open device detail
Click the device name in the list to open the detail page (device ID, protocol, connection URL, status).

Step 4: Start and simulate plug/unplug
Click Start device when disconnected. After a few seconds, status becomes Connected. In the Connector status table, toggle plugged / unplugged and view charging state.
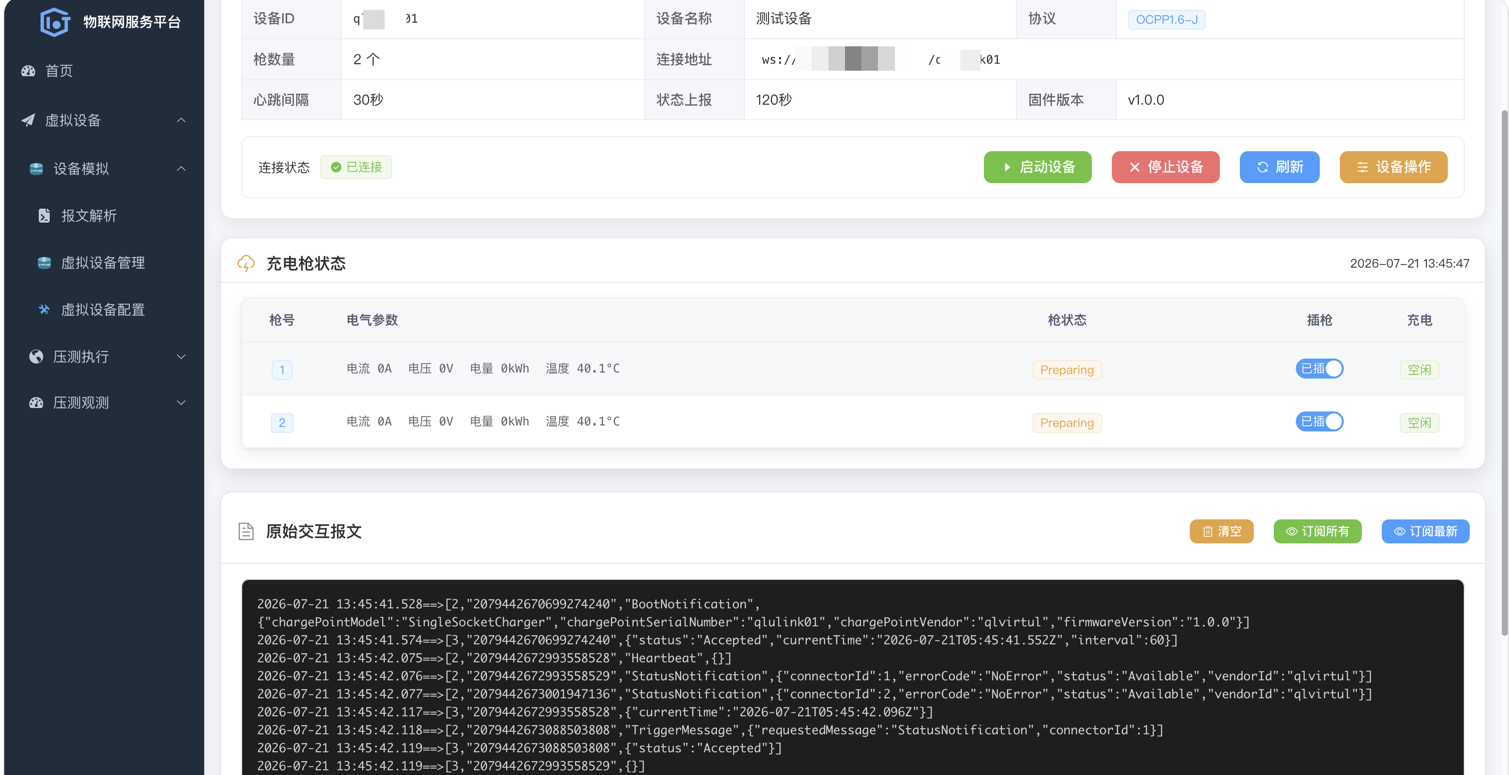
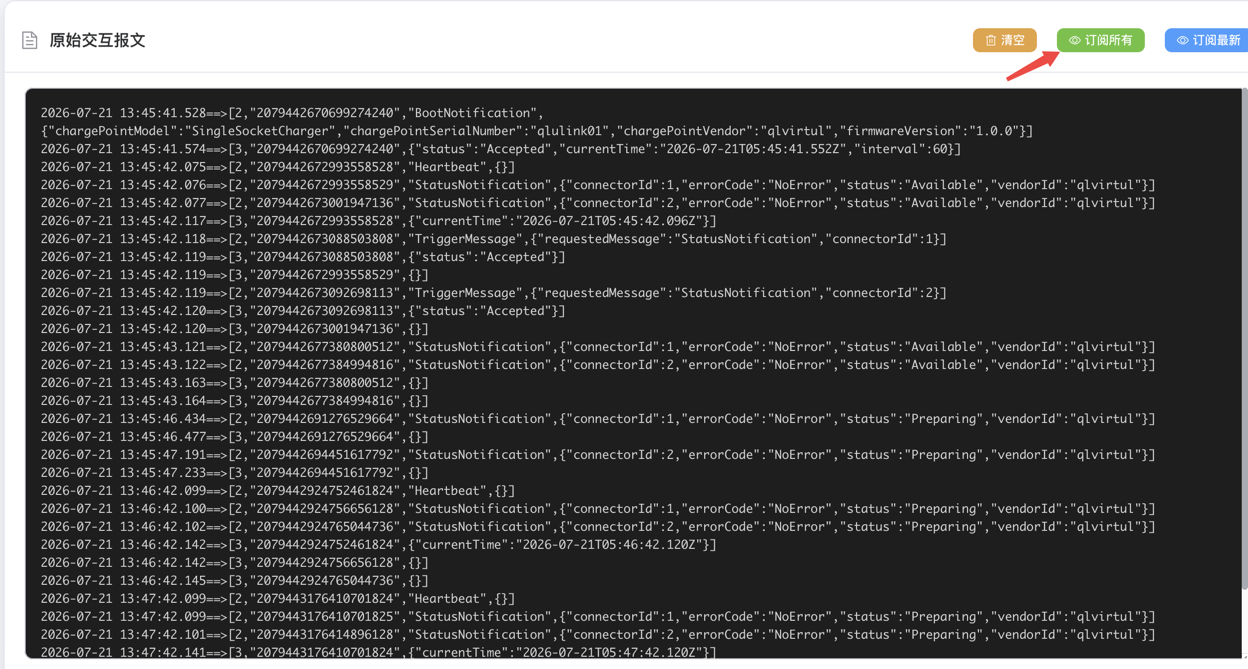
Step 5: Subscribe to live messages
When Connected, use the Raw message log section at the bottom:
- Subscribe latest — recent traffic (recommended)
- Subscribe all — full stream
- Clear — empty the log pane
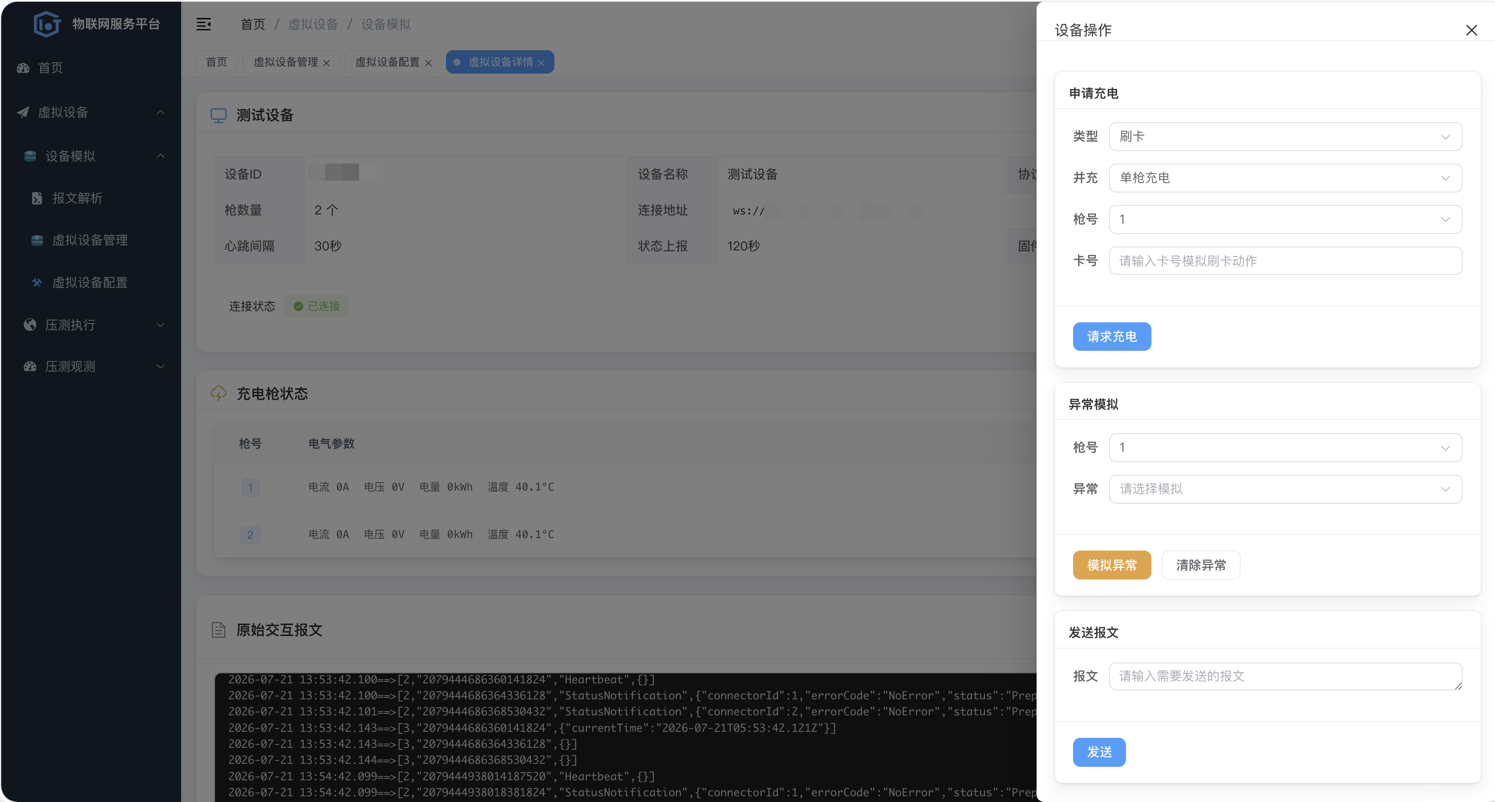
Device actions (when online)
Click Device actions to open the drawer:
| Action | Description |
|---|---|
| Request charge | Simulate card swipe or VIN plug-and-charge; single or dual-gun parallel |
| Simulate exception | Inject fault codes |
| Clear exception | Reset fault state |
| Send message | Send custom protocol payload (advanced) |
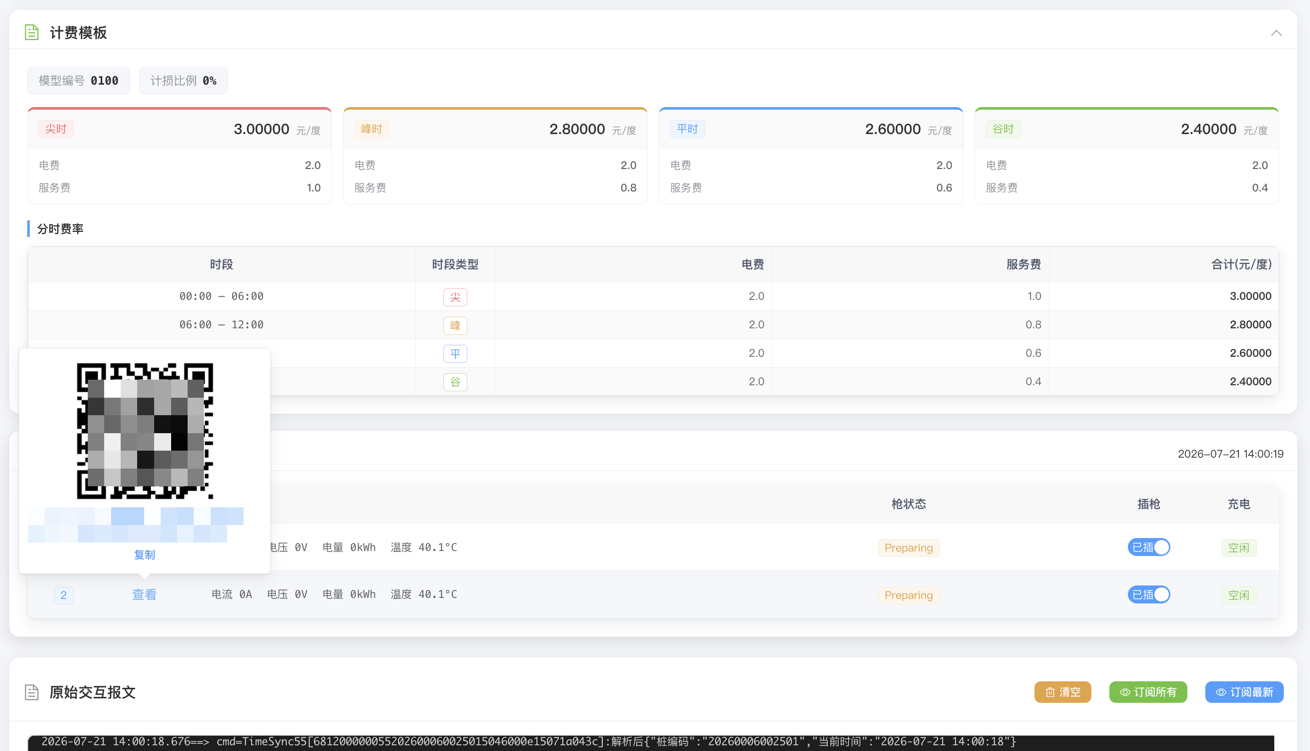
YKC billing model
For YKC devices, after the platform sends billing model frames (0x58 / 0x0A), the detail page shows Billing model: model ID, tip/peak/flat/valley rates, time-of-use slots, etc.
Simulation vs load testing
| Simulation (this guide) | Large-scale load test | |
|---|---|---|
| Use case | Single-pile debugging | Mass connections, capacity |
| How it runs | Console start/stop | User-side agent + test plans |
| Docs | This page | Load testing |
FAQ
Which protocols are supported?
YKC 1.6 and OCPP 1.6-J support both single-device debugging and large-scale load testing — see load testing.
What extra fields does OCPP need?
WebSocket path is required. Enable SSL and configure client/root certificates if your platform uses TLS or mTLS.
How do I simulate card swipe or remote start?
When online, open Device actions, choose swipe or VIN, enter card/VIN and connector, then Request charge.
How do I view protocol traffic?
After starting the device, use Subscribe latest or Subscribe all at the bottom of the detail page.
Simulation vs load testing?
Simulation is for one pile and business-flow debugging. Load testing uses distributed agents for many devices — see the load testing guide.
Device is running but no messages appear?
Ensure status is Connected and subscription succeeded. Verify the platform responds to login/heartbeat.
Next steps
- YKC frame format: YKC protocol
- Large-scale load test: Load testing
- Agent JAR or contact: Contact